
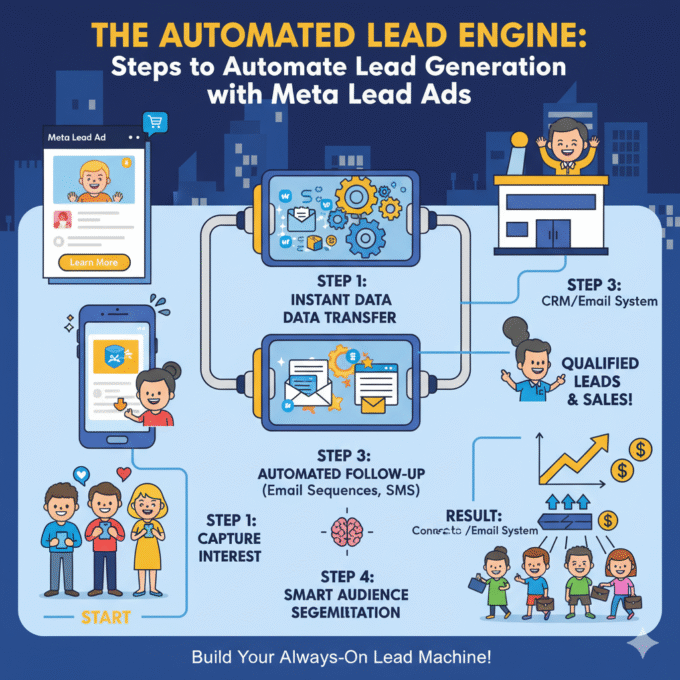
The Automated Lead Engine: Steps to Automate Lead Generation with Meta Lead Ads
Steps to Automate Lead Generation with Meta Lead Ads
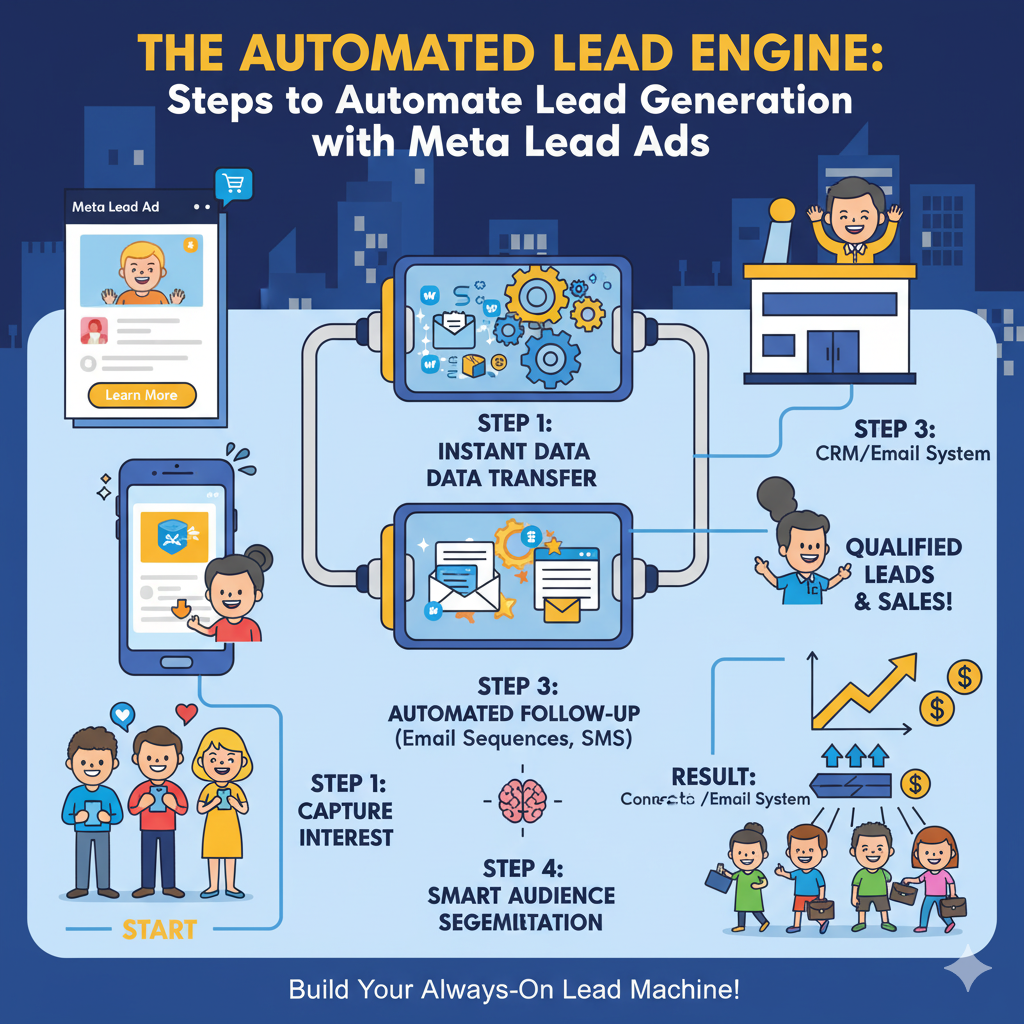
Meta Lead Ads are a powerful, low-friction tool for customer acquisition, but their true potential is locked away until you automate the lead flow. Manually downloading lead files is a relic of the past; it’s slow, error-prone, and kills the critical speed required for sales conversion.
The modern standard for high-growth businesses is to create an immediate, seamless connection from the moment a user submits the form to the moment a sales rep is notified. This guide outlines the essential steps to automate your lead generation with Meta Lead Ads, transforming a static ad into a dynamic, real-time sales pipeline.
The Foundation: Building the Automated System
The entire automation process hinges on linking your Meta Lead Ads to your Customer Relationship Management (CRM) system. This connection ensures leads are followed up with while they are still highly engaged, maximizing your conversion rate.
Step 1: Set Up and Optimize Your Lead Ad and Form
Before automation, you need a high-quality source of leads.
- Choose the Right Objective: In Meta Ads Manager, select the Lead Generation objective.
- Design the Instant Form: This is the most crucial step.
- Prioritize Speed & Value: Use Meta’s auto-fill feature for name, email, and phone number.
- Add a Key Qualifier Question: Use one or two multiple-choice questions to instantly qualify and segment the lead (e.g., “What is your company size?” or “Are you interested in Product A or B?”). This data is essential for your follow-up sequence.
- Choose “Higher Intent” Form Type: This option adds a review screen, reducing lead volume slightly but significantly increasing lead quality.
- Use a Strong CTA: The ad’s Call-to-Action (CTA) and the form’s intro screen must clearly articulate the value exchange (e.g., “Download Your Free Guide” or “Get a Custom Quote”).
Step 2: Connect Your Lead Form to Your CRM (The Automation Bridge)
This is the technical step that eliminates manual data entry and unlocks speed. You have three primary options for setting up this automation:
| Integration Method | Best For | Speed & Complexity |
| 1. Native Integration | Major CRMs (HubSpot, Salesforce, Zoho) | Fastest, Least Complex |
| 2. Third-Party Tools | Any CRM without a native connector | Flexible, Easy Setup (Zapier, Make, LeadsBridge) |
| 3. Conversions API (CAPI) | Advanced teams needing maximum data accuracy | Most Complex, Highest Data Quality |
The Process (Using a Third-Party Tool as a Common Example):
- Select Your Bridge: Log into an automation tool (e.g., Zapier, Make).
- Set the Trigger: Select Meta Lead Ads as the Source App. Set the trigger event as “New Lead.”
- Set the Action: Select your CRM (e.g., Pipedrive, Mailchimp, Google Sheets) as the Destination App. Set the action as “Create/Update Contact.”
- Map the Fields: Carefully match the fields from your Meta Lead Form (Name, Email, Custom Questions) to the corresponding fields in your CRM. Crucially, map the Ad Set ID or Campaign Name to a custom field in your CRM for accurate source tracking.
Step 3: Test and Verify the Automated Flow
Do not go live without testing. A broken integration means lost, cold leads.
- Use the Meta Testing Tool: Go to the Meta Developers platform and use the “Lead Ads Testing Tool.”
- Submit a Test Lead: Select the correct Page and Form, and click “Create Lead.”
- Verify CRM Entry: Immediately check your CRM. The test lead should appear instantly, with all fields correctly mapped and the lead source clearly tagged. If the lead is missing or incomplete, re-check your field mapping.
The Follow-Up: Automating Speed and Nurturing
Automation should not stop at data transfer. The goal is to maximize the speed of follow-up, which is the single biggest factor in lead conversion.
Step 4: Automate Instant Sales Notifications
The average lead qualification rate drops by over 10 times if a response is delayed by more than an hour. You must automate immediate internal alerts.
- Sales Rep Assignment: Set up a rule in your CRM to automatically assign the new lead to a specific sales rep based on the lead’s qualification answer (from your custom form question in Step 1).
- Instant Notification: Trigger an automated notification (Email, Slack message, or SMS) to the assigned sales rep, containing the lead’s details and the source campaign.
Step 5: Automate the First Customer Touchpoint (The Nurture)
The lead needs value and confirmation within seconds.
- Immediate Auto-Responder: Trigger an email sequence from your CRM/Email Service Provider (ESP) to send a “Thank You” email instantly. This email should deliver the promised incentive (e.g., the e-book link) and welcome them.
- Segmentation: Use the custom field data you mapped in Step 2 (e.g., “Interested in Product A”) to place the lead into a specific, hyper-personalized nurture email sequence.
Step 6: Close the Loop with Conversion Leads Optimization
For true, long-term growth, you must teach Meta which of your leads are high-quality, paying customers.
- Use the Conversion Leads Goal: Once you have a stable CRM integration, switch your campaign’s performance goal from “Maximize Leads” to “Maximize Conversion Leads.”
- Send Offline Events Back: Use your integration (especially CAPI) to send offline conversion events back to Meta (e.g., “Demo Booked,” “Quote Requested,” or “Closed Won”).
- The Result: This process feeds actual sales data back into the Meta algorithm, which then optimizes your ad delivery to find more people who are likely to become high-value customers, not just form-fillers.
By fully automating your Meta Lead Ads from click to CRM, you reduce friction, speed up response time, and transform your ad spend into a predictable, scalable revenue engine.


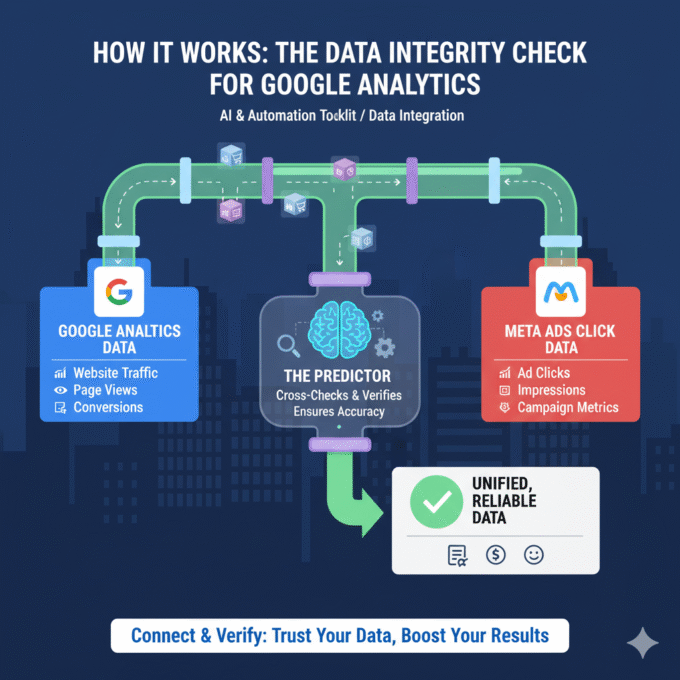
The Data Integrity Check for Google Analytics
How It Works: The Data Integrity Check for Google Analytics In the...
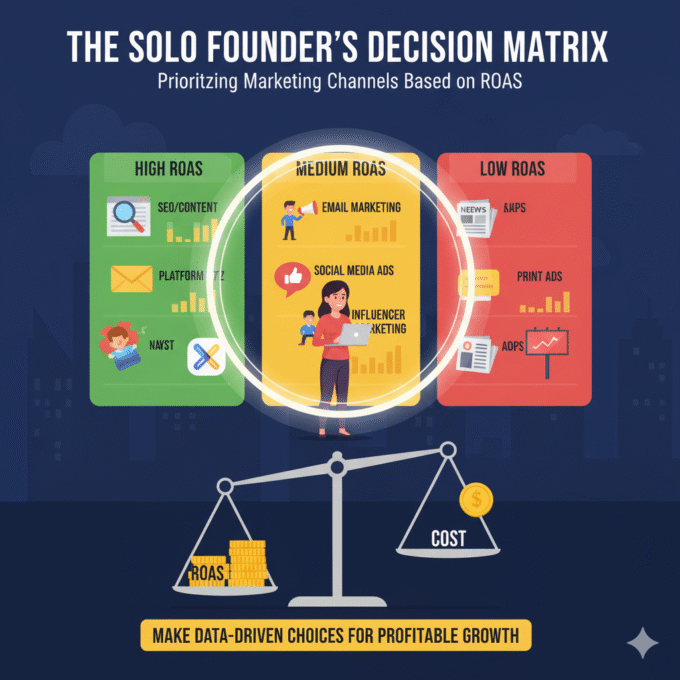
The Solo Founder’s Decision Matrix: Prioritizing Marketing Channels Based on ROAS
The Solo Founder’s Decision Matrix As a solo founder, your most precious...
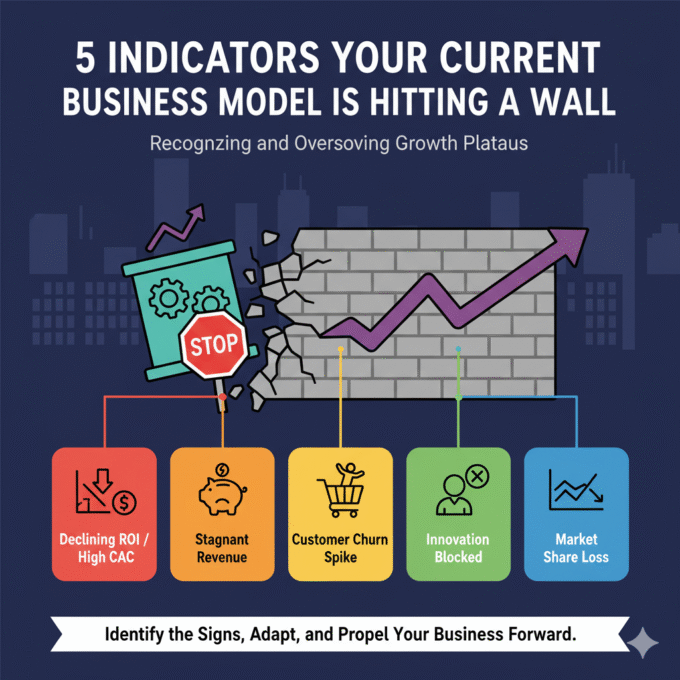
5 Indicators Your Current Business Model is Hitting a Wall
5 Indicators Your Current Business Model is Hitting a Wall The success...
The Automated Lead Engine: Steps to Automate Lead Generation with Meta Lead Ads
Steps to Automate Lead Generation with Meta Lead Ads Meta Lead Ads...

META Andromeda update main secret
Creative as a Data Signal: How Meta’s Andromeda Update Rewrote the Rules...
Meta Andromeda: The Next-Generation AI Engine for Performance Growth
I. Executive Summary: The Andromeda Paradigm Shift 1.1. Introduction to the AI...

The Data Integrity Check for Google Analytics
How It Works: The Data Integrity Check for Google Analytics In the...
The Solo Founder’s Decision Matrix: Prioritizing Marketing Channels Based on ROAS
The Solo Founder’s Decision Matrix As a solo founder, your most precious...
5 Indicators Your Current Business Model is Hitting a Wall
5 Indicators Your Current Business Model is Hitting a Wall The success...
META Andromeda update main secret
Creative as a Data Signal: How Meta’s Andromeda Update Rewrote the Rules...